Some of the links shared in this post are affiliate links. If you click on the link and make a purchase, we will receive an affiliate commission at no additional cost to you.
Unifi Identity is an optional cloud solution for Unifi networks. The system offers advanced role management and related services such as Unifi Access, One-click Wifi & VPN and a Single Sign-on service.
What is SSO / Single Sign-on?
Single sign-on means one-time registration and describes a procedure in which the user has access to several services and resources with one registration. Probably the best-known example of a single sign-on service is Google. Anyone who operates a website with a login function, an app or other service can offer users the option of registering directly with their Google account and then logging in. This means that if you are already logged in to Google in the browser, you don’t have to enter a password again.
Unifi UID offers exactly the same for numerous apps. This means that every user receives a Unifi UID access and can then, if it is configured, log in directly to providers such as Dropbox, Zoom or GitHub. Unifi UID’s single sign-on service is implemented using two standards: SAML 2.0 & OpenID Connect. This makes it possible to integrate pretty much all services and software that offer single sign-on integration.
Set up login to a WIKI.JS wiki with the Unifi single sign-on service
First of all, we need as recent an installation of Wiki.JS as possible and, of course, a UID Workspace.
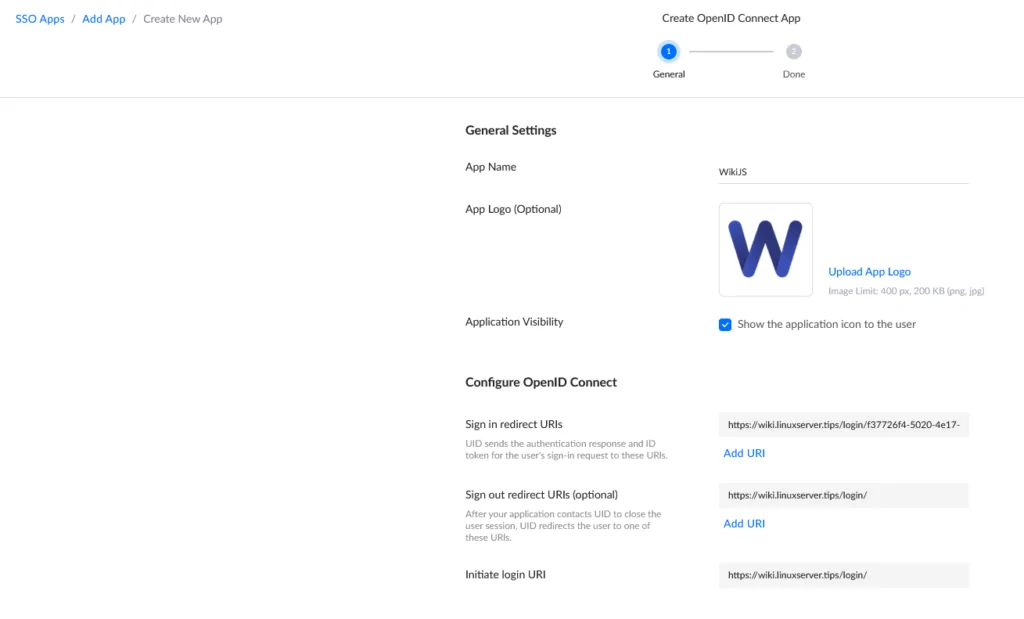
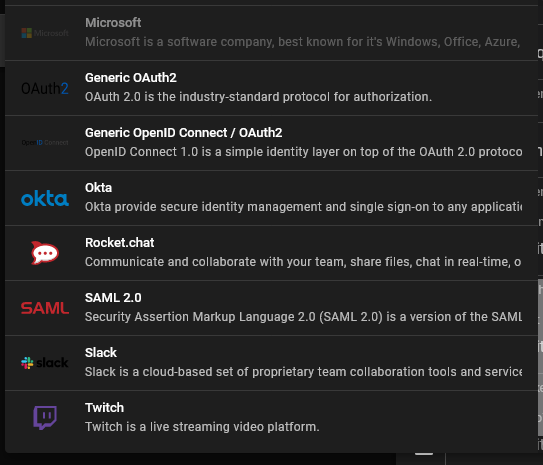
Once we have logged into our Unifi UID Workspace, we click on the Block icon. There we see a selection of applications that can be included using a template. Wiki.JS is not one of them. So we click on “Create New App” in the upper right corner and select “OpenID Conncect” in the following dialog and click on “next”. There we have to name the app, in our case e.g. “WikiJS”. In addition, we can upload a logo, which can be changed later. Now we already have to make the first specifications.
So we go to our Wiki.JS installation and navigate via the cogwheel in the upper right corner to “Administration”. There we click under “Modules” on “Authentication” and there on “Add Strategy” A drop-down menu opens, there we select “Generic OAuth2”.
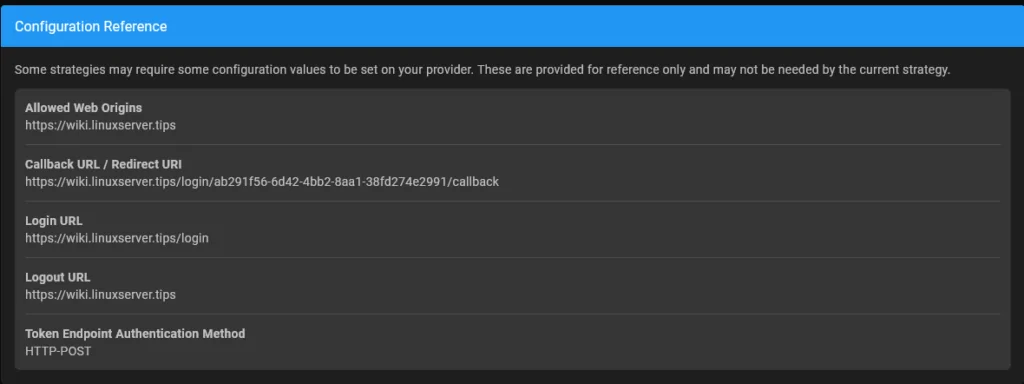
At the very bottom of the page we find the information we now need to enter on the Unifi UID page: Callback URL / Redirect URL
We copy the callback URL of our Wiki.JS installation into Unifi UID into the field “Sign in redirect URIs”.
The login URL is entered in the “Initiate login URI” field.
Even if the UID specifies that the sign out redirect URL is optional, it is recommended to simply put the login URL there. If you do not do this, you will be redirected to the Unifi page after logging out.
Once the URLs are stored, we click on “Next” There we see an overview with a number of other URLs and two letter and number combinations. The Client ID and the Client Secret can be copied directly at Wiki.JS into the corresponding fields. Now we have to add the other URLs to Wiki.JS:
Authorization endpoint -> Authorization endpoint URL
Token endpoint -> Token endpoint URL
User Infor Endpoint -> User Info Endpoint URL
ID Claim -> id
DisplayNameCLaim -> displayName
Email Claim: email
End session endpoint -> Logout URL
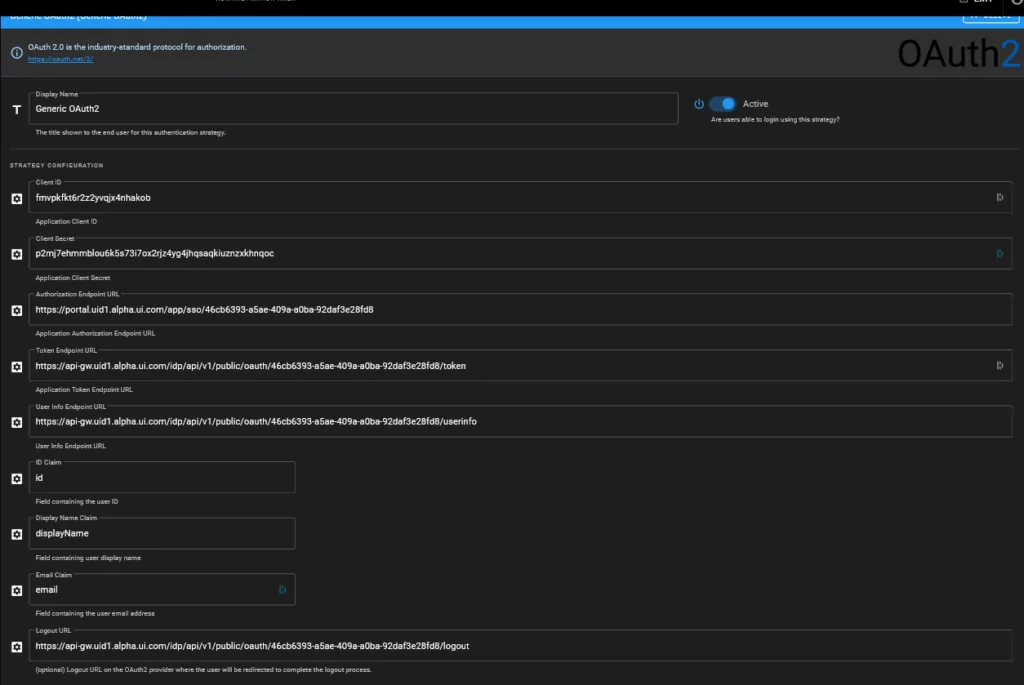
Under these input fields you can set whether the users can register themselves and whether this should only be possible with certain email domains. In addition, a standard group can be selected. If the users should only be able to read, “Guest” is selected here.
Now we click on “Done” under Unifi UID and on “Apply” under WikiJS. Now it is possible to log in to the Wiki.JS installation with your Unifi UID account.


