Some of the links shared in this post are affiliate links. If you click on the link and make a purchase, we will receive an affiliate commission at no additional cost to you.
Synology DSM7 has introduced stricter restrictions on what packages are allowed to do. When DSM6 is used, Tailscale runs as root with full privileges and these steps are not required.

By default, Tailscale on Synology with DSM7 only allows inbound connections to the Synology device, but outbound Tailscale access from other applications running on the Synology NAS is not enabled.
The reason for this is that the tailscale package does not have the authorization to create a TUN device.
To enable TUN to allow outgoing connections from other apps running on the Synology, the following steps must be performed:
Time needed: 5 minutes
- Install Tailscale on the Synology NAS
Make sure you are using Tailscale 1.22.2 or later, either via the Synology Package Center or a manually installed *.spk from the Tailscale Packages Server
- Create a custom script
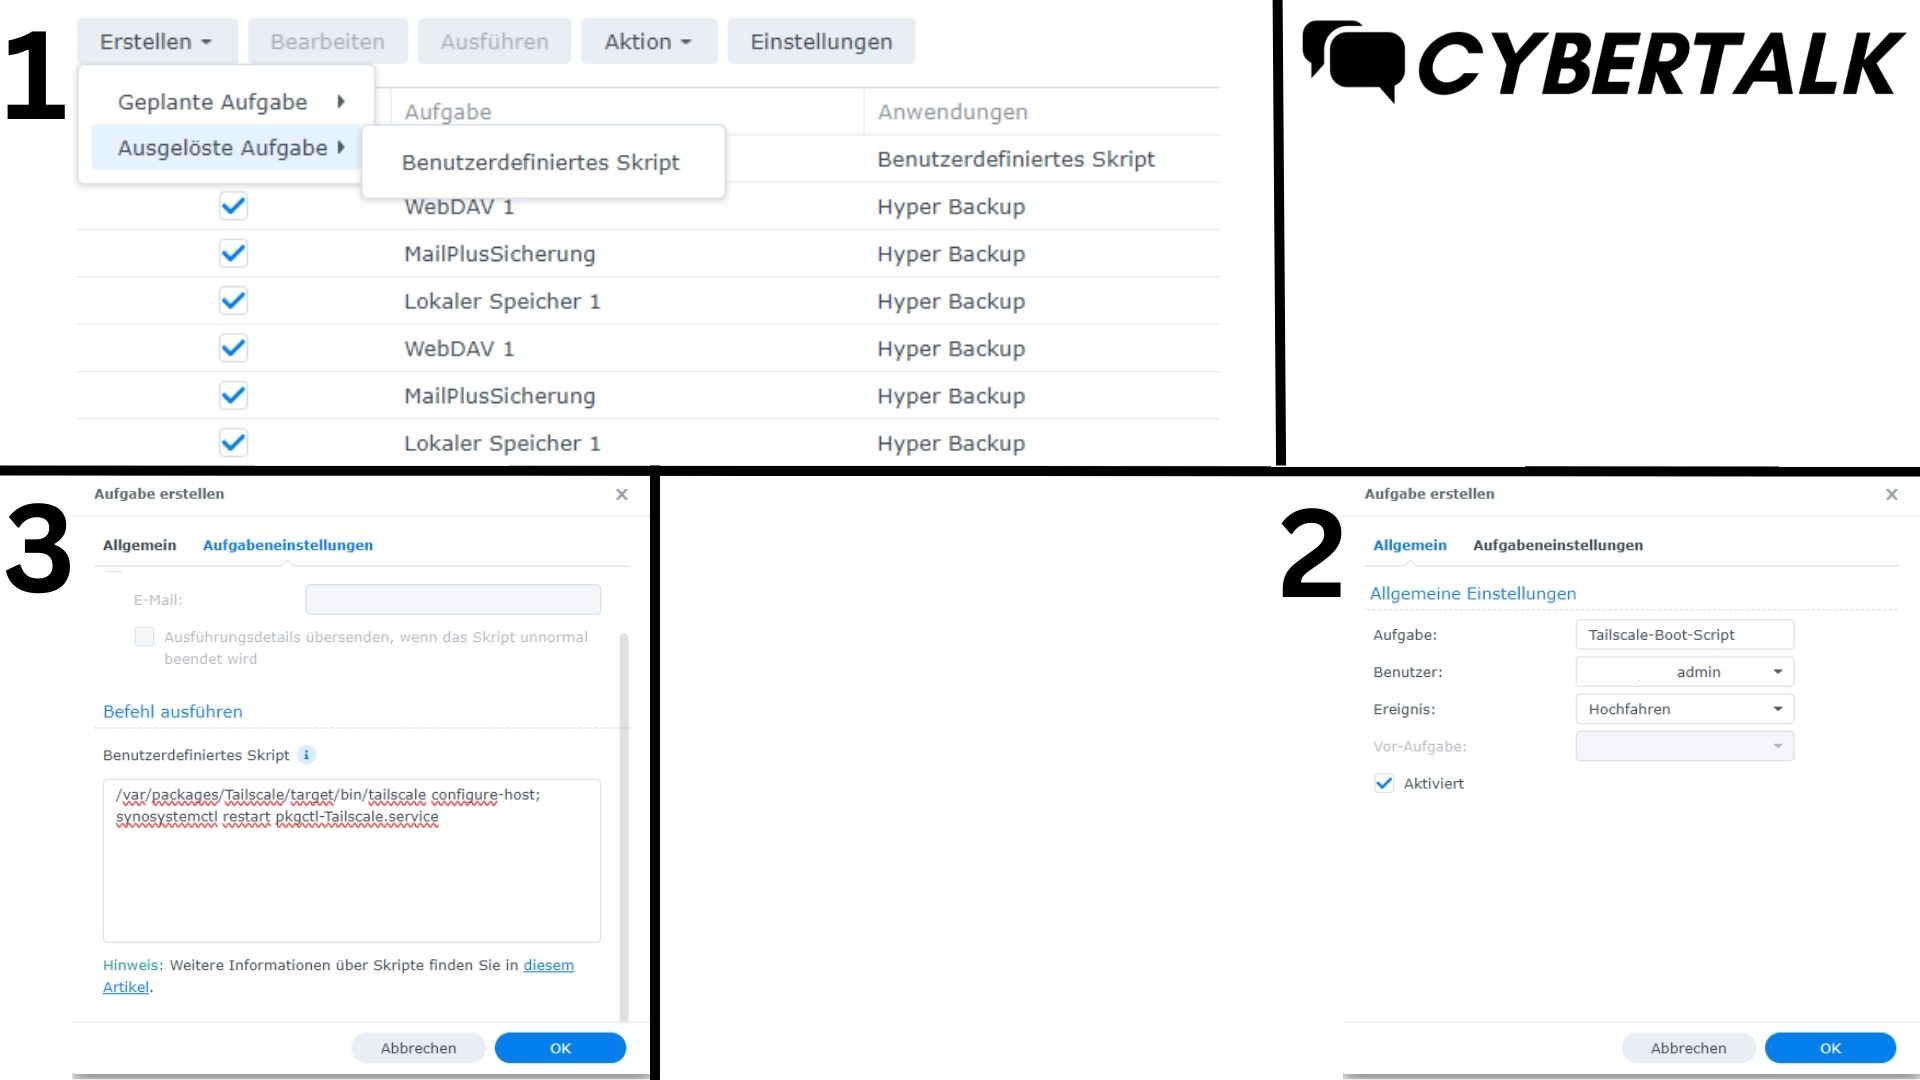
In Synology DSM, go to Control Panel > Task Scheduler, click Create and select “Triggered Task” Select “Custom Script.” When the Create Task window appears, click General.
Under General Settings, enter a task name, select root as the user for whom the task will run and select Boot-up as the event that triggers the task. Make sure that the task is activated.
Click Task settings and enter the following for Custom script:/var/packages/Tailscale/target/bin/tailscale configure-host; synosystemctl restart pkgctl-Tailscale.service
Click OK to save the settings.
Restart the Synology. (Alternatively, to avoid a reboot, run the above custom script as root on the device to restart the tailscale package).
The TUN settings should now be preserved each time you reboot your device.
- Customize Synology Firewall (If enabled)
When TUN is enabled, tailscale traffic flows through Synology’s built-in firewall.
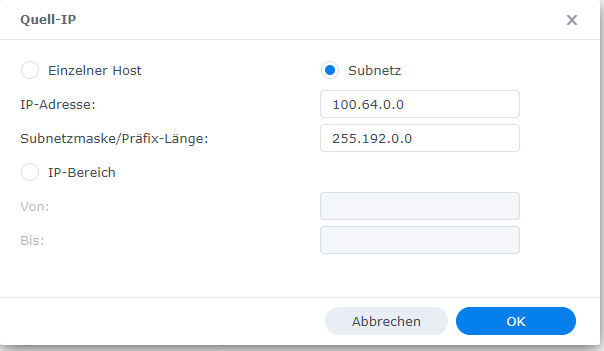
The firewall is disabled by default. However, if it is enabled, add an exception for the tailscale subnet, 100.64.0.0/10. In Main Menu > Control Panel > Security > Firewall, add a firewall rule to the default profile that allows traffic from the source IP subnet 100.64.0.0 with subnet mask 255.192.0.0.

